Ticking along nicely with the fourth module. Built the gantries to connect to the central platform.
Kept all nice and simple. But when doing a dry fit found there was a gap between the gantries and platform.
So by capping the ends that problem was sorted.
The whole was given a black undercoat and painting proper began.
Metal areas were given a coat (all by airbrush) of Tamiya Flat Aluminium, followed MIG Ammo Shadow Rust (patches) and finally Tamiya Smoke (patches and low PSI).
The floor and legs of the platforms were airbrushed with Tamiya Deep Green, followed by Tamiya Flat Green and finally Tamiya Yellow Green. But restricted the to edges of the module only with the last colour.
I wanted to give it a worn/dirty appearance with out having to use a lot of techniques particularly sponging on the damage/grime.
I then gave all the metal areas a wash of Seraphim Sepia but by removing most of the wash from the brush so as not to soak the area. The platforms glued in place...
Will probably do some more weathering detail work and have to add a few fixtures and fittings. But coming along nicely. No safety rails on the platforms for playability sake. The walkways are approx. 50mm wide.
Blood Angel given a base coat of Vallejo Steel ready for the red.
The Emperor Protects.
Sunday, 19 May 2019
Friday, 17 May 2019
Progress Report 137.19.M3
The last of the ten Intercessors from the Dark Millennium box is built and waiting for paint.
Being the second Sergeant decided he needed more skulls. Leading the way in purging the heretic!
I then got side-tracked by starting the fourth module. Again based around the Cave Terra Former from Sally 4th.
Added a 25mm deep polystyrene block the base and used foamncore to add depth to the wall. Moving on slightly...
1mm plasticard and 3.2mm channel added to the walls and doorways reinforced. 1mm MDF added to the floor. Then used DAS clay to seal the edges and the top of the walls. All being well I intend to add gantries running over the floor (hence the scribbling and lines across the MDF). Made a start on those...
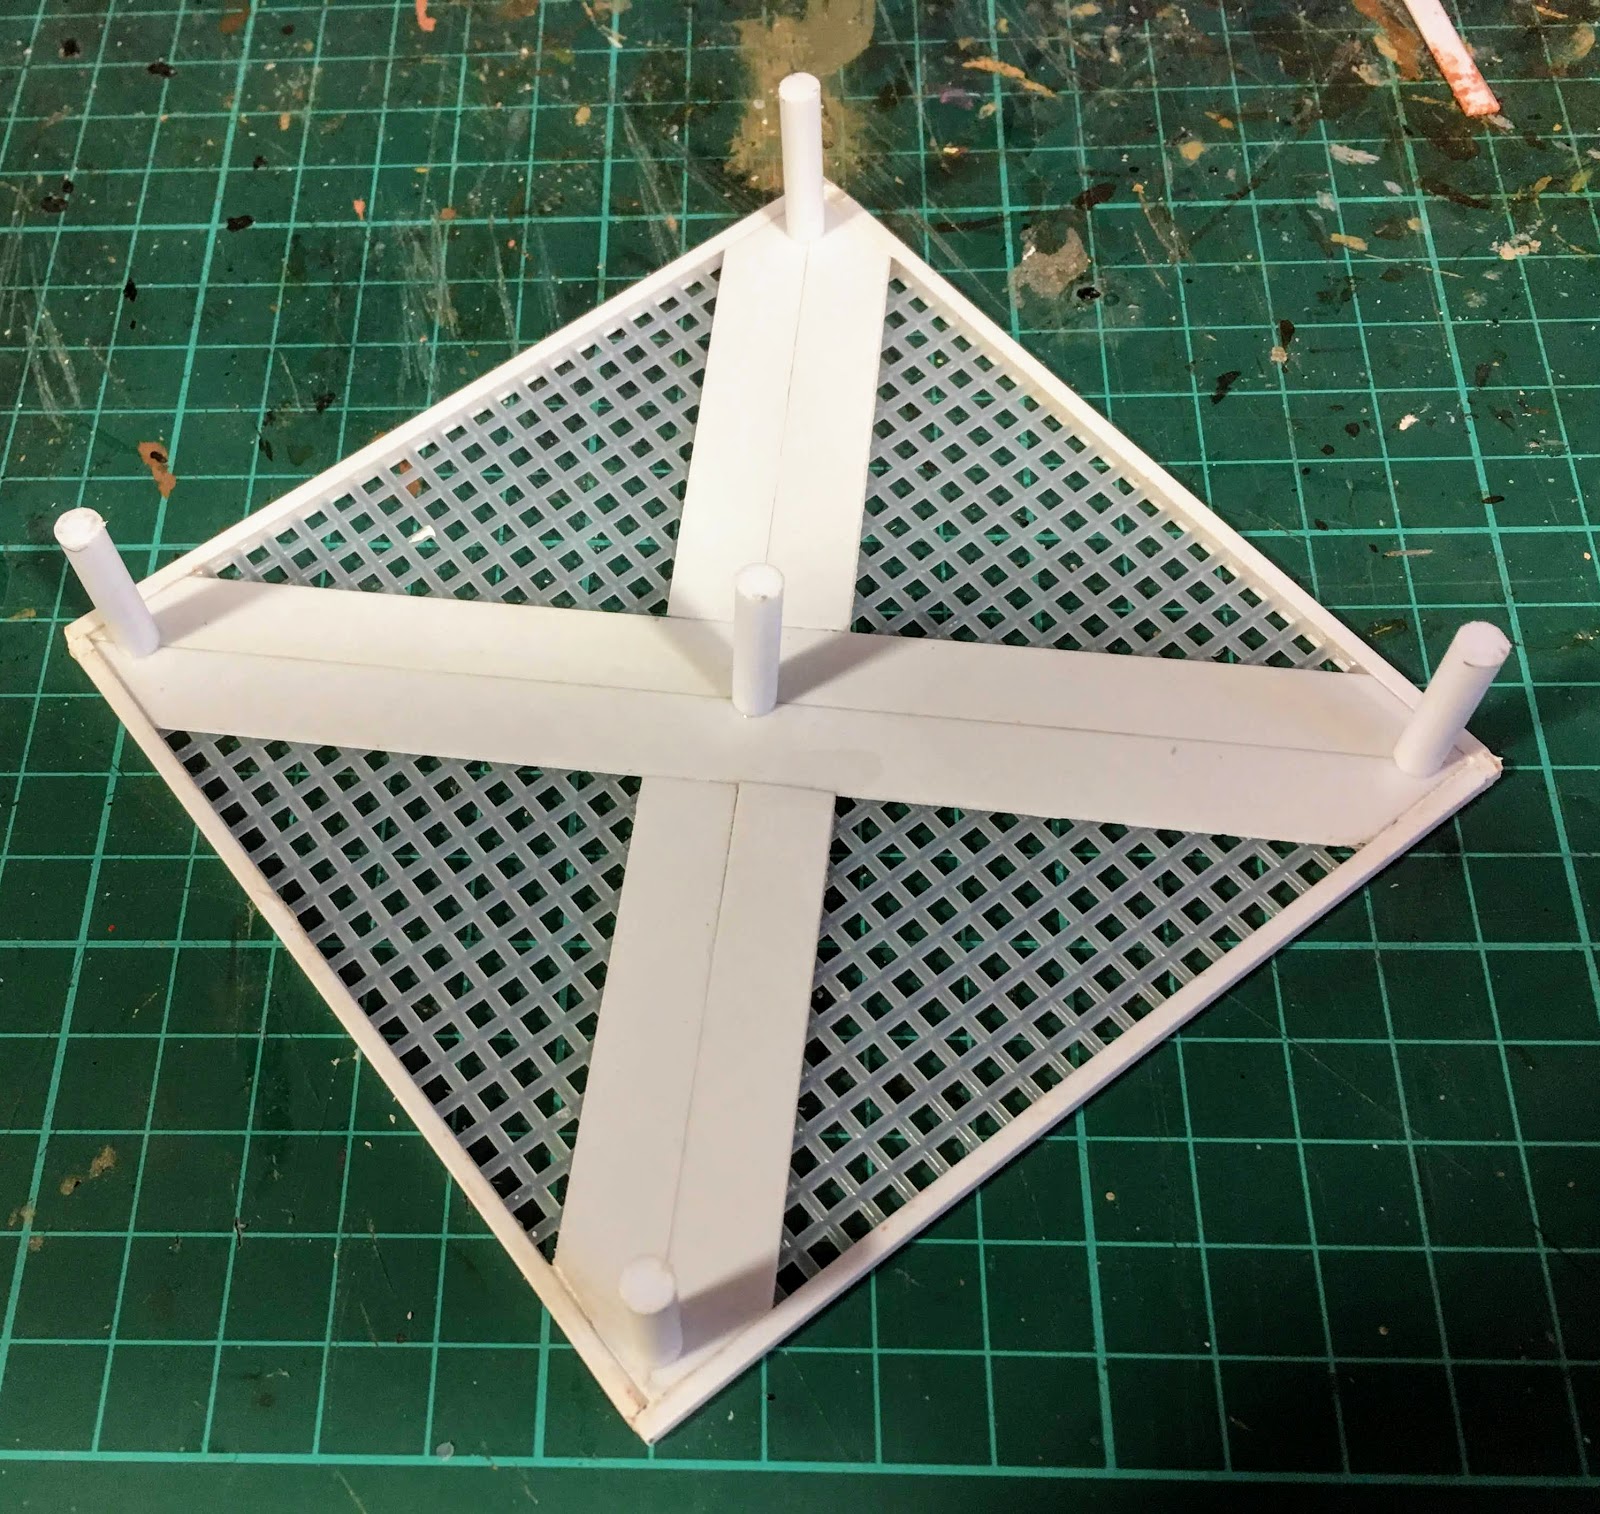
A 4" square piece of Darice plastic mesh. Reinforced with plastic U channel and 1mm plasticard underneath. Then added five 20mm long legs to raise it off the ground. This platform I intend to place in the middle of the board,
Started work on two of the connecting gantries.
Also backed this on Kickstarter Black Crab Miniatures 2. Missed the first one but these look great.
Being the second Sergeant decided he needed more skulls. Leading the way in purging the heretic!
I then got side-tracked by starting the fourth module. Again based around the Cave Terra Former from Sally 4th.
Added a 25mm deep polystyrene block the base and used foamncore to add depth to the wall. Moving on slightly...
1mm plasticard and 3.2mm channel added to the walls and doorways reinforced. 1mm MDF added to the floor. Then used DAS clay to seal the edges and the top of the walls. All being well I intend to add gantries running over the floor (hence the scribbling and lines across the MDF). Made a start on those...
A 4" square piece of Darice plastic mesh. Reinforced with plastic U channel and 1mm plasticard underneath. Then added five 20mm long legs to raise it off the ground. This platform I intend to place in the middle of the board,
Started work on two of the connecting gantries.
Also backed this on Kickstarter Black Crab Miniatures 2. Missed the first one but these look great.
The Emperor Protects
Sunday, 12 May 2019
And in Other News (12th May 2019)
I do have another blog running which I stopped using a few months back...say about a year. I was planning on posting back on there but for simplicities sake I intend to post historical and other projects on this 40K blog. They will be kept separate and appear maybe weekly. Of course depending on output.
So first up Vikings!!! A long time a go I bought shed loads of Vikings and Anglo Saxons to play out battles in 9th/10th Century England. Made starts then stopped and so on. The models are all metal Gripping Beast the lovely Colin Pattern sculpts. So recently started tearing the figures off the bases re-undercoating them (yes even if already painted). Read various rule sets and set about painting Danes for the Great Heathen Army.
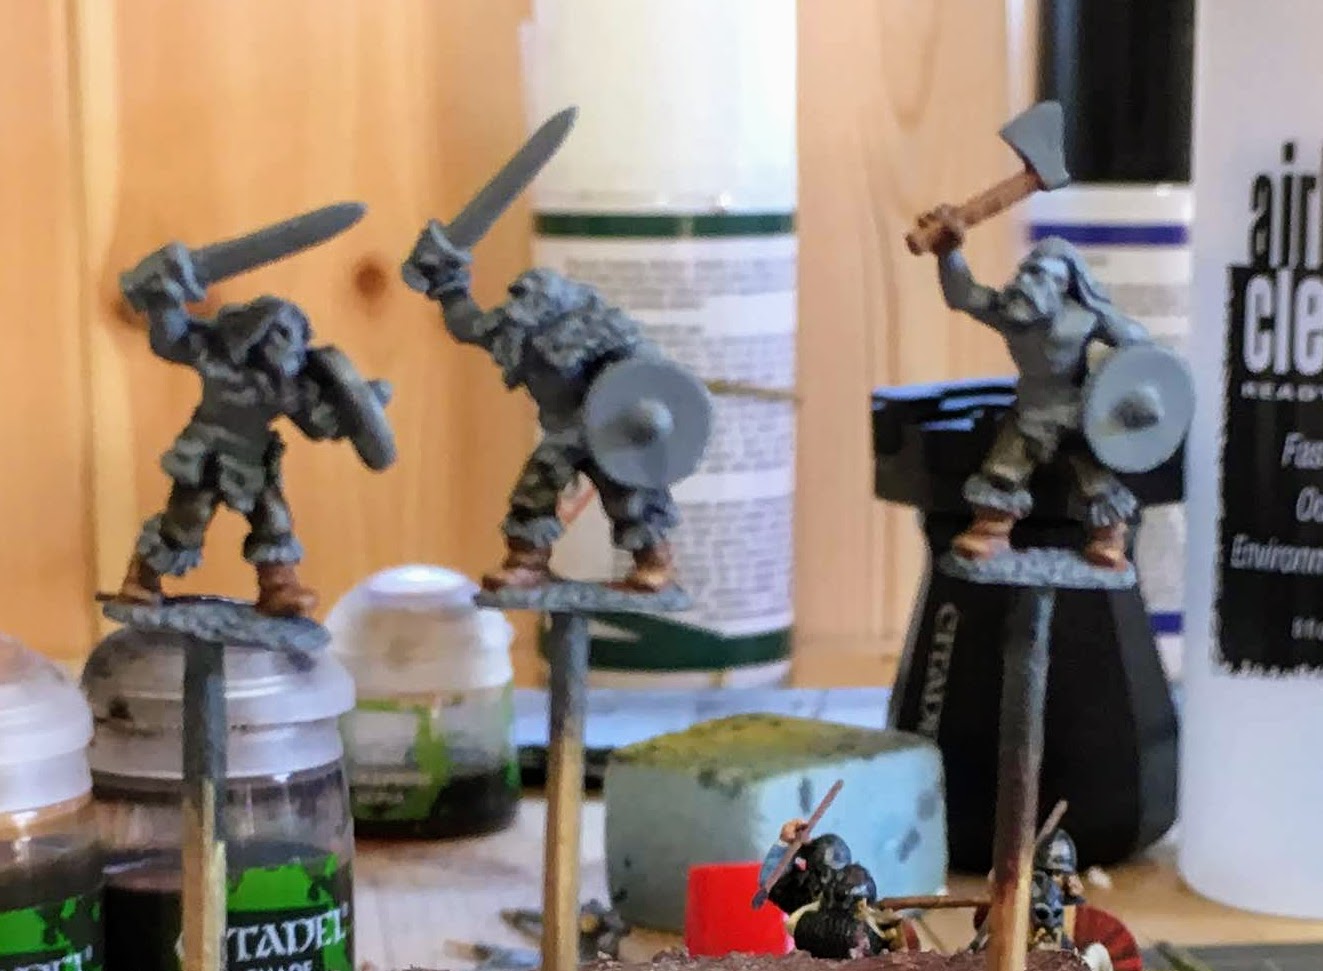
The figure with the halved painted shield was done a few weeks back the others maybe two years ago. I was planning on using them for DBA/DBMM but has I mentioned above been drowsing rules recently and I have decided to use them for Sword Point from Gripping Beast. So these now look like this (done this week!)
On 40mm square Renedra plastic bases. These are waiting in the wings...
About half of these figures were painted but since my painting style has changed a quick light grey undercoat saw to that. The good thing is I have probably close to another four or five dozen (maybe more) figures cleaned up and ready for painting. They were based so at least I could use an unpainted army (Heresy!!!). Made a start on another figure too...
I don't expect to finish anytime this year with these though.
Keeping with the Barbarian theme. Copplestone Castings 15mm Barabarians for HoTT.
These were based and painted a couple of weeks ago. Based these as Blades and drawing inspiration from Robert E Howards Hyboria. Giving them red hair like the description of the Vanir. Three more started this week.
This project I do want to get done relativity quickly. So lets see how that goes!
Finally my final current project. The 77th Indian Brigade or Chindits. Warlord models sculpted by Paul Hicks I believe. Certainly looks like his excellent work.
The rifle man was completed last week the NCO/Officer with M1 carbine finished this week. I am wondering if the captured katana is a homage to Lieut. George A Cairns VC. Rather than just a way to identify the command figure. Wikipedia Lt. Cairns VC.
One more on the desk ready to go..
Again this will be a slow burn project.
So that's it for this round up of Other News. Quite a productive week. Well done me!
So first up Vikings!!! A long time a go I bought shed loads of Vikings and Anglo Saxons to play out battles in 9th/10th Century England. Made starts then stopped and so on. The models are all metal Gripping Beast the lovely Colin Pattern sculpts. So recently started tearing the figures off the bases re-undercoating them (yes even if already painted). Read various rule sets and set about painting Danes for the Great Heathen Army.
The figure with the halved painted shield was done a few weeks back the others maybe two years ago. I was planning on using them for DBA/DBMM but has I mentioned above been drowsing rules recently and I have decided to use them for Sword Point from Gripping Beast. So these now look like this (done this week!)
On 40mm square Renedra plastic bases. These are waiting in the wings...
About half of these figures were painted but since my painting style has changed a quick light grey undercoat saw to that. The good thing is I have probably close to another four or five dozen (maybe more) figures cleaned up and ready for painting. They were based so at least I could use an unpainted army (Heresy!!!). Made a start on another figure too...
I don't expect to finish anytime this year with these though.
Keeping with the Barbarian theme. Copplestone Castings 15mm Barabarians for HoTT.
These were based and painted a couple of weeks ago. Based these as Blades and drawing inspiration from Robert E Howards Hyboria. Giving them red hair like the description of the Vanir. Three more started this week.
This project I do want to get done relativity quickly. So lets see how that goes!
Finally my final current project. The 77th Indian Brigade or Chindits. Warlord models sculpted by Paul Hicks I believe. Certainly looks like his excellent work.
The rifle man was completed last week the NCO/Officer with M1 carbine finished this week. I am wondering if the captured katana is a homage to Lieut. George A Cairns VC. Rather than just a way to identify the command figure. Wikipedia Lt. Cairns VC.
One more on the desk ready to go..
Again this will be a slow burn project.
So that's it for this round up of Other News. Quite a productive week. Well done me!
Progress Report 132.19.M3
Busy week. First up Blood Angels Primaris Marine finished.
Applied a base coat of VMA Steel to this one and then found it made it easier to visualize the battle damage. Finally happy with applying the damage to these figures. Figure nine finally happy!!! The switch from 1/72nd and 1/56th scale AFV's was a little tricky in transferring techniques from one medium to the other. But always learning! I've found that GW Nuln Oil and Agrax Earthshade are used for the initial weathering then VMC Smoke. Finally a little bit of oil paints to round it all off. When I first started a was using Oil and Enamel based products more with pigments. Which worked fine on the AFV's but not so much for me on these figures.
The above is a 1/72nd scale T34/76 one of the last vehicles I painted about 18 months ago. Weathering drab green with oils, enamels and pigments is so much easier that phonebox red! It's a Zvezda model.
So also made a start on the Escher ganger.
Base for her is completed.
Then painted some ladders for Module three...
Was going to glue these in originally but decided they will be kept loose to make the game potentially more interesting. Who knows, character's knocking them down, stealing them?
A rough idea of what they look like in situ. These are from Hexy Store. Must admit a bit disappointed with them. Bought other items from them which are really nice casts. But some of these ladders needed quite a bit of cleaning up. I've only weathered one side, the good side. I bought these to save time but really all they are, are H plastic rod and T plastic rod..cast in resin. So could I made them myself as originally planned in the time it took to clean them up? Probably not! But the two I have left are the worst of the bunch so may just cut them up to use as debris.
The Emperor Protects.
Having fun playing around with the basic colour scheme on each one. Adding little differences to each figure makes it a bit more interesting with painting all that red!
Applied a base coat of VMA Steel to this one and then found it made it easier to visualize the battle damage. Finally happy with applying the damage to these figures. Figure nine finally happy!!! The switch from 1/72nd and 1/56th scale AFV's was a little tricky in transferring techniques from one medium to the other. But always learning! I've found that GW Nuln Oil and Agrax Earthshade are used for the initial weathering then VMC Smoke. Finally a little bit of oil paints to round it all off. When I first started a was using Oil and Enamel based products more with pigments. Which worked fine on the AFV's but not so much for me on these figures.
The above is a 1/72nd scale T34/76 one of the last vehicles I painted about 18 months ago. Weathering drab green with oils, enamels and pigments is so much easier that phonebox red! It's a Zvezda model.
So also made a start on the Escher ganger.
Base for her is completed.
Then painted some ladders for Module three...
Was going to glue these in originally but decided they will be kept loose to make the game potentially more interesting. Who knows, character's knocking them down, stealing them?
A rough idea of what they look like in situ. These are from Hexy Store. Must admit a bit disappointed with them. Bought other items from them which are really nice casts. But some of these ladders needed quite a bit of cleaning up. I've only weathered one side, the good side. I bought these to save time but really all they are, are H plastic rod and T plastic rod..cast in resin. So could I made them myself as originally planned in the time it took to clean them up? Probably not! But the two I have left are the worst of the bunch so may just cut them up to use as debris.
The Emperor Protects.
Wednesday, 1 May 2019
Progress Report 121.19.M3
Quick update to keep me on my toes. Next Blood Angel Intercessor and Escher ganger built and ready for prepping etc..
With the next Intercessor gone out on a limb by pretty much building the whole model rather than breaking it done into it's component parts as normal. Will see this speeds up the painting process or frustrates it with the Marines it since detail will be hidden.
As noted when I started this Blog it is more for a diary record so I can keep a check on progress on 40K universe projects only. Like every other wargamer out there I have other projects on the go too. One of which can be seen lurking behind the Space Marine.
In case your wondering it's a Chindit for my intended WW2 Far East project.
The Emperor Protects.
With the next Intercessor gone out on a limb by pretty much building the whole model rather than breaking it done into it's component parts as normal. Will see this speeds up the painting process or frustrates it with the Marines it since detail will be hidden.
As noted when I started this Blog it is more for a diary record so I can keep a check on progress on 40K universe projects only. Like every other wargamer out there I have other projects on the go too. One of which can be seen lurking behind the Space Marine.
In case your wondering it's a Chindit for my intended WW2 Far East project.
The Emperor Protects.
Friday, 26 April 2019
Progress Report 116.19.M3
Third module complete.
Was conservative on colour palette which saved time. I find more and more that I use the same colours on different areas then put a wash or glaze/filter on the module to give a slightly different impression. I like to build the colour up in 'highlights' to try and blend the colours on top of each so a wash when applied pulls them altogether. As it should! I never soak the area with a wash but paint it on so any excess is removed before application. So for my own record;
Floor
Airbrushed Tamiya Neutal Grey
" Vallejo Air Concrete
" Vallejo Air Light Grey Green
Wash GW Seraphim Sepia
Rock Walls
Airbrush Tamiya Neutral Grey
" Tamiya NATO Brown (patches)
" Tamiya Deck Tan (patches)
Brush GW Seraphim Sepia (patches)
Brush Vallejo Tan Glaze (all)
Rockcrete Walls
Airbrush Tamiya NATO Brown
" Tamiya Deck Tan
" Vallejo Air Aged White
" Vallejo Air Light Brown (restricted to top and bottom of walls)
Brush Vallejo Tan Glaze
The detritus on the floor also received a drybrush of Vallejo Panzer Aces Light Mud.
I need to add a few bits of terrain for this piece but otherwise it's 99% complete.
To give an idea of the depth an Escher and Orlock ganger face off!
On to Module four. Which will be more involved if my plans work out!
The Emperor Protects.
Was conservative on colour palette which saved time. I find more and more that I use the same colours on different areas then put a wash or glaze/filter on the module to give a slightly different impression. I like to build the colour up in 'highlights' to try and blend the colours on top of each so a wash when applied pulls them altogether. As it should! I never soak the area with a wash but paint it on so any excess is removed before application. So for my own record;
Floor
Airbrushed Tamiya Neutal Grey
" Vallejo Air Concrete
" Vallejo Air Light Grey Green
Wash GW Seraphim Sepia
Rock Walls
Airbrush Tamiya Neutral Grey
" Tamiya NATO Brown (patches)
" Tamiya Deck Tan (patches)
Brush GW Seraphim Sepia (patches)
Brush Vallejo Tan Glaze (all)
Rockcrete Walls
Airbrush Tamiya NATO Brown
" Tamiya Deck Tan
" Vallejo Air Aged White
" Vallejo Air Light Brown (restricted to top and bottom of walls)
Brush Vallejo Tan Glaze
The detritus on the floor also received a drybrush of Vallejo Panzer Aces Light Mud.
I need to add a few bits of terrain for this piece but otherwise it's 99% complete.
To give an idea of the depth an Escher and Orlock ganger face off!
On to Module four. Which will be more involved if my plans work out!
The Emperor Protects.
Wednesday, 24 April 2019
Progress Report 114.19.M3
Lots of work on the third module.
The idea was too make it look like the floor had collapsed leaving a thin lip and the original floor sunken to the bottom. The rock walls have been carved from 10mm blue foam. In places I had to add DAS clay due to minor mishap. I put detritus around the edges to represent rock fall and used PVA to glue it down. To make sure this stuck a then used MIG Ammo Sand and Gravel glue. Unfortunately in places this glue melted the foam. So it little bit of back filling was required but otherwise it did leave some natural looking shapes.
A few damaged pipes were added from bits of left over plastic tube and a few bits of jewellery wire stuck into add a bit of interest. On the top walls above what's left of the floor I used Vallejo White Stucco which gives a very good finish. Applied with a spatula and much easier to control than using a cheaper alternative such as wall filler.
I'm thinking of adding terrain to this board. To give myself an idea of what it would look like a few pieces from the Ryza STC ruins have been placed. My intention with these modules was to leave the central parts free to place scatter terrain. So I'm not totally sold on the idea of permanently fixing the terrain.
It is the right height though or just about.
Ideally to make it look truly caved in I should have varied the height and angles of the floor but time and playability took over. Any way painted black ready for the first coats of paint.
A few damaged pipes were added from bits of left over plastic tube and a few bits of jewellery wire stuck into add a bit of interest. On the top walls above what's left of the floor I used Vallejo White Stucco which gives a very good finish. Applied with a spatula and much easier to control than using a cheaper alternative such as wall filler.
I'm thinking of adding terrain to this board. To give myself an idea of what it would look like a few pieces from the Ryza STC ruins have been placed. My intention with these modules was to leave the central parts free to place scatter terrain. So I'm not totally sold on the idea of permanently fixing the terrain.
It is the right height though or just about.
Ideally to make it look truly caved in I should have varied the height and angles of the floor but time and playability took over. Any way painted black ready for the first coats of paint.
The Emperor Protects
Subscribe to:
Posts (Atom)